

RV Upgrades, Part I
- Joel Stoner

- Mar 11, 2024
- 10 min read
Updated: Mar 29, 2024
February 1, 2024
Here's a list of the upgrades I made to the RV before our departure, roughly in the order I completed them, along with links to where you can purchase some of the items.
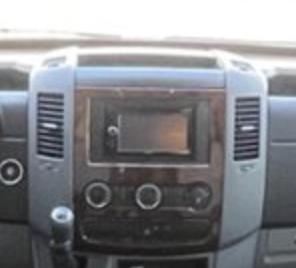
1. The stereo, of course... Max came with a stock 2016-ish Sony radio, that had a Tom Tom nav system, but it didn't have CarPlay to allow it to link to my iPhone to display Maps, Waze, Goggle Maps, Siri, Music, etc. This was pretty important to me. Separately, it would only show the rear camera when the RV is in Reverse, and it'd only show the Left/Right cameras when you turn on either blinker. The cameras were low resolution (480p), which is not great, and I also didn't like that you couldn't see ALL the cameras ALL the time. After looking at a few options online and realizing that even though I would enjoy doing the install myself, with everything else going on (packing to move, etc), it would make sense to pay someone else to do it. So, I went to Simon's Stereo on Lankershim Blvd. in North Hollywood, and Simon recommended a JVC/Kenwood DMX 1057XR, which features a 10" touch screen, and of course CarPlay. Now I can see and talk to my maps and other apps on a nice big screen on the dashboard.

I also had them upgrade the stock 5.25" speakers in the doors to a pair of Infinity speakers (same size), and they definitely do sound better! I was tempted to add a subwoofer, but it was a lower priority than some of the other stuff.
2. Cameras. The above stereo also had three camera inputs, but they behaved the same as the previous unit, only showing them (and again replacing the map screen) with the lo-res camera screen, which doesn't seem like a great idea; if I need to merge into a lane quickly to make an exit shown on the map, I don't want to lose the map view, etc... So, I also purchased this Losuudy 4 camera system, which includes 4 new much higher resolution 1080p cameras, which are always on, and also always recording, including up to 3 hours after you turn the ignition off.

I had the same guys install it. The crazy thing is that this whole system - with the 10" display, and 4 -1080p cameras (always recording to SSD), and cables, was only $240 after a discount coupon!
There was an issue, though...the rear camera was intermittent - sometime it'd work, and sometimes wouldn't, so after double-checking all the connections, I wrote to the manufacturer via Amazon, and they rushed a free replacement rear camera, which I was able to replace myself - it fixed the problem!
Once both were installed, the 2016 Sprinter cockpit looked just a bit more like a spaceship!


3. Sumo Springs. My first impression when driving the RV was it felt a bit like steering a boat, in that whenever it turns or goes over a bump, it tends to rock back a forth a few times more than it should ("and I don't... want my boat...to be rockin'"). Quick research showed that this is a common issue with RVs built on Sprinter vans, as the RV addition makes it a bit more top heavy than the suspension was designed to handle. Enter Sumo Springs, which are 3rd party replacement/upgrades to factory bump stops to help minimize rocking, and improve overall control and comfort.


They're made from patented micro-cellular urethane, they compress up to 80% of original height with full memory rebound and definitely help dampen the sway. They make different models for different vehicles, and also for front & rear. They're surprisingly easy to install (took me about 10 minutes each, but you might get a little dirty). These are the ones I ordered:
Front: https://amzn.to/3wRMM1x
Rear: https://amzn.to/4a6cuO7
I was going to make a video of my installation process, but a bunch already exist on YouTube - here's one: https://www.youtube.com/watch?v=1ljPvooYRFE
Anyway, they made a significant improvement in the rocking & swaying of the RV. Mission accomplished!
4. Tire Pressure Monitor System (TPMS). The Sprinter 3500 chassis has "Dualies," which means there are two rear tires on each side. Because the inside tires are hard to reach and difficult to see, you don't have a way to know if they are getting low on air. And, knowing we'd be spending A LOT of time driving, from a safety perspective, it was was worth it to get this system. (newer models have TPMS built in).
I chose the B-Qtech TPMS with 6 Flow Thru Sensors( 0-199PSI), 7 Alarm Modes, Real Time Display of Pressure and Temperature.

Why? This one had six sensors, one for each tire, and the sensors are also "flow thru" meaning that you don't need to remove them to add air to the tires. I liked the built-in solar charger (it sits on the dash), the general look of it, that it shows both pressure and temperature, and has alarms for when either gets too far above or below your preferred settings.
BUT... after it arrived, I realized that the inner tires didn't have Tire Valve Extenders on them, meaning that the valves were unaccessible, and that I'd have to take the outer wheel off not only just to install them, but also to replace the batteries, or even just to top off the tires if the sensor said they were low, which was the whole point of getting them. So, off I went to Western Tire in Burbank, where they installed the extenders on the inner tires. When I went to pick up the RV, they reminded me what Gary (from LA RV Center who sold me the RV at told me), which was that even though the rear tires still had low milage and a good tread on them, they were now 8 years old and the rubber was old, deteriorated & weak. There was an increased chance that they'd blow while traveling - not a risk I wanted to take. The guy told me about his relative who ignored a similar warning and his tires DID blow, but also took out the black water tank in the process. Messy. I wanted to avoid that, and it made sense to get fresh tires for our long journey, so back it went a day later for new tires. (The front tires had already been replaced when I bought it).
As of this writing, a few months after install, two of the batteries have died, one of the batteries leaked & corroded the contacts. They were Panasonic batteries. Fortunately, I was able to scrape off the corrosion and install new batteries in both. However, upon re-installing them, one of them was suddenly picky about how tight it would get, and the other triggered a low pressure alarm a few hours after re-install. Since then, I've disconnected the TPMS and will look into it again later.
5. Water Accessories. RVs usually come with two hoses, one to supply fresh water (typically white, grey or blue), and the other to flush the black tank (typically red or orange). Best not to mix them up! This RV did come with them, but since it was used, I replaced the fresh water hose (couldn't be sure that someone else hadn't mixed them up). I also realized we'd be living in the RV during winter, so I bought a hose that had a built in heating element to prevent the water inside from freezing (or at minimum warms up any almost freezing water before it flows into the RV pipes). So this is the one I ordered. It plugs into the AC outlet in the bin where all the water & power stuff goes...or on the supply end if there is power there - it includes a coupling adapter for multiple usage options.

Haven't needed to try the heating aspect of it yet, but sure it's only a matter of days until I do!!
While researching the matter, Amazon determined I might require additional water hardware, and suggested this: RV Water Pressure Regulator, Inline Water Filter, Hose Splitter, Brass Elbow, Flexible Connector, Hose Quick Connects, Leak Repair Kit, and Carrying Case

While this made me feel like a victim of Amazon's pushy sales bots, It really did seem like a handy thing to have. To this day, I'm glad I got it - it keeps all these necessary fresh water accessories clean and in one place, offers the quick connect/disconnect connectors, filter, pressure regulator, etc. Totally worth it (in my opinion), especially when you're constantly connecting & disconnecting these hoses.
6. Sewer Support. Another thing you don't realize you need until you need it is this: RV Sewer Hose Support.

The black water & gray water tanks drain out of a 3" outlet about a foot above the ground, into a flexible hose that goes from the tank outlet to the sewer drain. Because it's flexible, it needs support as it travels down to ensure there aren't any up-ramps along the way that might cause a back flow, (or worse, no-flow out to the sewer). This one folds up nicely, includes a nice clip to keep it tight when not in use, and it's lightweight.
7. Sewer Support - Part 2. As mentioned above, the black & grey tanks drain out of the same outlet. Each tank has its own gate valve with a long cable from the actual valve to the handle (kinda like bicycle brakes), so you can control when the contents are released into the sewer.
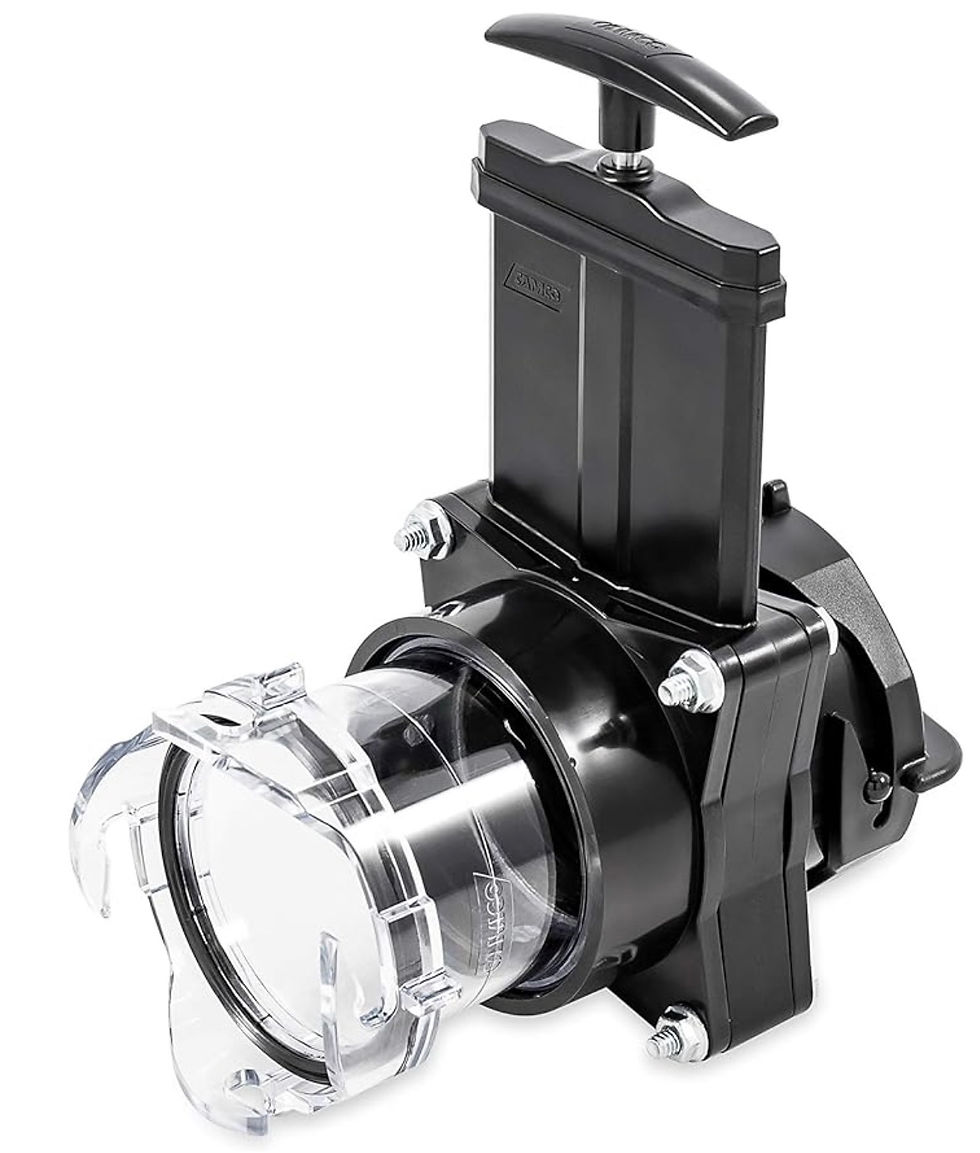
Sometimes they can get a bit hard to open or close due to the long cable and stuff in the drain, so this Camco Camper/RV Gate Valve with Built-in Clear Adapter provides a number of advantages. 1. It adds a secondary gate valve to the final combined output of the tanks. 2. It includes a transparent section of tubing so you can not only see when it's full, but also what's inside it as it exits the tanks.
Yeah, it's gross, but as you're flushing out the black tank, it's really important to be able to see if what's coming out is still 'black' or clear water. This final gate valve, since there are no cables, is much easier to open/close for repeated flushing. The item definitely makes this particular task less dreadful (even though you can see more of what you may not want to see), and adds peace of mind that you're not driving down the road with contents from your black & gray tanks leaking along the way!
8. TVs. Max came with two 2016 Jenson 32" 780p TVs (one in the living/dining area, and the other in the bedroom). They actually looked and worked great, but the world of TV has changed a lot in the past eight years. Much, if not all of what we watch, is now streaming. So while it felt a bit extravagant, I replaced the two TVs with Vizio 32" 1080p smart TVs. Fortunately, they were on sale at Target for $139 each. Part of my rationale was that they are also lighter, and weight is an issue with RVs.

I have a few gripes: 1. After using an Apple TV for years, the general response of these things is very slow, and more importantly...they load apps very slowly. It can take up to 30 seconds to load Netflix or Amazon, which on one hand is definitely a "1st world problem," but also, on a comparative/everyday usage basis, that's a long time to load an app on hardware made in 2023.
2. The old TVs received about 20 channels over the RV's built-in antenna. Somehow, these don't receive any. I thought maybe the antenna got whacked by a low branch or something, and haven't had the gumption to check it out, so I ordered a new Vansky digital antenna on Amazon. I finally received it the other day, and hooked it up when we got to the current, remote RV park. Still no antenna channels. But it's raining and we're in a remote place, so maybe that's why. We'll have to live with just streaming for a couple more days. 3. While the TV does have WiFi, some of the RV parks we've stayed at have WiFi that requires a full browser to log in. These TVs don't have one, so we have to use our own WiFi. 4. My original plan with these was to use my new iPhone 15 as a hotspot for the TVs. Turns out, that doesn't work well either. I won't bother to explain here, but that necessitated the next item, which turned out to be a blessing in disguise.
9. Hotspot. As mentioned above, the TV's don't particularly like using the phone as a hotspot, and I also know that it'd be handy to have another source of data (as well as a WiFi network) we could both log onto.

Enter the AT&T branded Netgear Nighthawk M6 Pro That link goes to Amazon, but I ordered mine through AT&T.
The service offers 100gb a month for $99, plus a monthly $12 lease payment for 3 years. It feels like a bit of a rip off, but it's solved a number of problems, so we'll live with it. Interestingly, there are times when it has a better signal than my ATT phone, and vise/versa, so apparently they use different networks, which I suppose can be an advantage.
10. Bluetooth Amp/Receiver Max came with a separate, bulky, old style Jensen stereo system for the 'house', with a CD/DVD player. It was installed in a cabinet above the cockpit. Call me a snob, but it bugged me...

We wouldn't be using the CD/DVD, it was huge, and upon unscrewing it from the cabinet, I discovered there was a ton of open, unused space behind that wall that we could use. So, I found a small bluetooth amp receiver - this one, the AK-380 USB SD BT.C FM & AUX Audio Power Amplifier. 400W+400W 2.0 CH HiFi Stereo Bluetooth 5.0 Amp Receiver with 12V 5A Power Supply, Remote Control, FM Antenna. It's about the size of a small fat paperback book.

It obviously has Bluetooth, so we can play music from our phones into the 'house', but also a line input, and also an FM radio, in about a quarter of the space. And while it includes a power adapter, it actually runs on 12VDC. At some point, I might re-wire it to use the battery power for when we're boondocking (camping without a 120v power source to plug into). I have already sawed out the opening to make the available space accessible.
Here's the "before" (sorry it's blurry, but notice the "solid wood here" space!):

And the "after" with the replacement and all the new space (see the binoculars in the same space). I haven't screwed the new Bluetooth amp in yet, it's on the to-do list.

Bonus: While I was checking the house speakers a few days earlier, I temporarily removed the one to right of the TV to look inside the cabinet behind the TV. Noticed a ton of space hidden there, too!

Here's what I saw.. (camera is looking into the hole where the speaker is above - the back of the wall behind the TV is to the left). Behind the insulation is the top nose of the RV.

So, I moved the wires out of the way, used the articulating mount to move the TV out of the way, and cut a similar sized hole behind the TV, which revealed around 3 square feet of space within the fiberglass nose of the RV above the cockpit. Since the manufacturer obviously didn't expose this space, my assumption is that it is not intended to carry much weight. We're utilizing it with lightweight bulky things, such as extra pillows and dry food items. Nonetheless, thrilled to have any additional space!


That's enough for this post, but it's only Part 1! I'll have a new post on this topic soon. For now, here's the scoop on the eBikes!
As an Amazon Associate, we may earn a referral commission on qualifying purchases.


Comments